WordPress is an open-source blog management system that allows users to manage blog categories, posts, additional pages, and similar content in the most basic form. But, with the help of WordPress plugins and themes, users can create almost any kind of website using WordPress. Users can also learn to create custom plugins and themes in WordPress, allowing them to customize their websites further.
WordPress is a word that doesn’t need any introduction when it comes to Content Management Systems. It is by far the standard, effective, and widely used content management system. WordPress will allow users to create almost any kind of website on the internet.
More than 300K websites out of the top 1M on the internet runs on WordPress when it comes to popularity. Since WordPress is an open-source CMS (Content Management System), users can use it for free for any purpose, and users can also modify and resell it. In this tutorial, we will learn about the steps to create an admin user, change user roles, and remove a user on a WordPress website.
List of User Roles
The roles that can be assigned to a user in a WordPress website are:
Administrator: The admin user with the highest level of permissions. Admins can access almost everything on the website.
Editor: The editor user has access to all the posts, comments, pages, tags, categories, and they can upload anything to the Media.
Author: This user can write, upload Media, publish, and edit their own posts.
Contributor: This user has no uploading or publishing capability but can edit and write their own posts until they are published.
Follower (public sites) / Viewer (private sites only): Users can read and comment on pages and posts.
Subscriber: This user is similar to the Follower/ viewer role; they can read and comment on pages and posts.
Create an Admin User
In order to add a new WordPress admin user, follow the below steps:
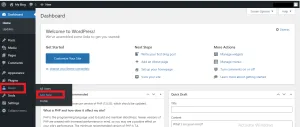
1. First, log in to the user’s WordPress dashboard as an admin or root user.
2. Go to the Users section from the left-side panel and select the Add New option.
3. Then, enter the user’s preferred username for the new admin user in the Username field.
4. Enter the email address for the user in the Email field.
5. After that, enter the first name and last name of the user.
6. Optional. Enter the website details in the Website field.
7. Optional. Then, enter the user password in the Password field.
8. Next, tick the Send the new user an email about their account option to send the details of the new administrator user to the user’s email address.
9. After that, set the user role as administrator from the drop-down.
10. Finally, click the Add New User button.

11. Now, users can view the newly added admin user in the user’s list.

Change Roles for a User
In order to change the role of a user in a WordPress website, follow the below steps:
1. First, log in to the user’s WordPress dashboard as an admin or root user.
2. Go to the Users section from the left-side panel.
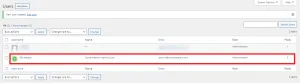
3. Click on the user whose role needs to be changed and click the Edit button.
![]()
4. In the edit page, go to the Role field and select the Role that the user wants to set for the user from the drop-down, for example, Author.
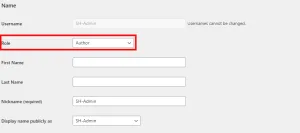
5. Finally, click the Update User button.
Remove User
As an administrator user of a WordPress website, users can remove other users from their website team. For that, follow the below steps:
1. First, log in to the user’s WordPress dashboard as an admin or root user.
2. Go to the Users section from the left-side panel.
3. Then, click on the user who we would like to delete.
4. Decide whether the user would prefer to have all of that user’s content attributed to another user on the website or delete all their content permanently. If the user would like the content to be attributed to another user, follow these additional two steps:
- Select the Attribute all content to another user option.
- Then, select another user from the select a user drop-down. The drop-down will list all the available users.
5. Finally, click the Delete user button.
In order to simply delete an admin user, follow the below steps:
1. First, log in to the user’s WordPress dashboard as an admin or root user.
2. Go to the Users section from the left-side panel.
3. Then, click on the user who we would like to delete.
4. Click the Delete button present below the username.
![]()
5. On the next page, click the Confirm Deletion button to confirm the deletion.
6. Now, the admin user is deleted, and users can no longer see the same in the user’s list.
Conclusion
This tutorial presents the steps to create an admin user, change user roles, and remove a user on a WordPress website. Hope this tutorial was helpful, and do reach out to us if you have any queries or suggestions.