The cloud computing services offered by Oracle Corporation are commonly known as Oracle Cloud. The Oracle Cloud provides servers, storage services, networks, and more delivered to the customers using a global network that consists of several data centers managed by Oracle Corporation. After creating an instance in Oracle Clouds, users can create and attach a block volume to their instances.
The instances deployed in Oracle Cloud use an SSH key pair instead of a password for authenticating remote users. If a user does not have a key pair, they need to create one using standard third-party tools (if users have OpenSSH, they can instead use a key pair that Oracle Cloud Infrastructure generates). After generating the key, launch the instance on a cloud network with subnets. Then, they need to connect to these created instances. If a user wants to attach some storage to these instances, add a cloud block storage volume.
Create a Key Pair
If users connect to their instance from a UNIX-based system or Windows system using OpenSSH, they can skip this step and use the key pair generated by Oracle Cloud Infrastructure. Also, if they already have an SSH RSA key pair, they can skip this below step and use the existing key pair. If OpenSSH is not installed in the Windows system, download and install the PuTTY key Generator before following these steps.
1. Find and double-click the puttygen.exe file to open it.
2. Configure the key by specifying the key type of SSH-2 RSA and a key size of 2048 bits:
- In the Key menu, select the default SSH-2 RSA key value.
- Choose the default key type, “RSA”, in the Type of key to generate section.
- Set the key size as 2048.
3. Then, click Generate.
4. Move the mouse/cursor around the blank area in the PuTTY window to generate random data in the key.
5. After the key is generated, it appears under the Public key for pasting into the OpenSSH authorized_keys file.
6. A Key comment is generated for the user, including the date and time stamp. Users can keep the default comment or replace it with a more descriptive comment.
7. It is recommended to leave the Key passphrase field blank.
8. Then, click the Save private key button and click Yes in the pop-up prompt about saving the key without a passphrase.
9. The private key is saved in the PuTTY Private Key (PPK) format, which works only with the PuTTY toolset.
10. Users can name the generated key anything they want but use the ppk file extension, such as abckey.ppk.
11. Please select all generated keys that appear under the Public key for pasting into the OpenSSH authorized_keys file, copy it using Ctrl + C, and paste it into a text file. After that, save the file in the same location as the private key. Please do not use the Save public key option because it does not save the key in the OpenSSH format.
12. Users can name their Public key anything they want, but for consistency purposes, use the same name as the private key with a pub file extension, such as abckey.pub.
13. Write down the names and locations of the public and private key files. Users will need the public key when they launch an instance, and they need the private key to access that instance via SSH.
Choose a Compartment
To work with a service in Oracle Cloud, the user must first select a service and choose a compartment they have permissions.
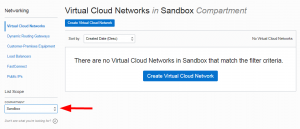
1. Open the navigation menu, click Networking, and then click Virtual Cloud Networks to choose the compartment.
2. Then, choose the Sandbox compartment or the compartment assigned by the administrator from the list on the left. If the Sandbox compartment does not exist, create a new compartment.
Create a new Compartment
To create a compartment in Oracle Cloud, follow the below steps:
1. First, log in to the Oracle Cloud Infrastructure.
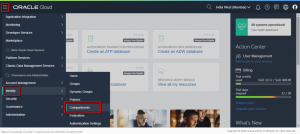
2. Open the navigation menu and click Identity & Security. Under the Identity section, click Compartments.
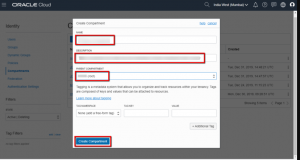
3. Click on the Create Compartment button.
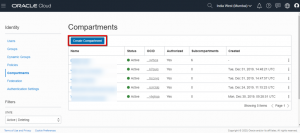
4. On the next page, fill in the following:
- Name: Mention “Sandbox”.
- Description: Enter a description (required) that briefly explains the purpose of the compartment, such as “Sandbox compartment for the getting started tutorial”.
- Parent Compartment: Select the compartment in which this compartment should reside. By default, the parent compartment is the root compartment (or tenancy).
5. After filling in the details, click Create Compartment.
6. Now, users will be able to view the created compartment in the list.
7. After that, choose a compartment, as shown above.
When a user selects the Sandbox compartment, they will only see resources that are in the Sandbox. When they create new resources, the system prompts them to choose the compartment in which they want to create them. By default, it will select the current compartment. If the user changes compartments, they must return to the Sandbox compartment to see the created resources.
Conclusion
This document presents a brief introduction on how to choose a compartment on Oracle Cloud Infrastructure. Hope this tutorial was useful, and do reach out to us if you have any query or suggestions.
