Linode is an American-based cloud hosting company that offers Virtual Private Servers (VPS). The company’s name, “Linode”, is a portmanteau of the words “Linux” and “node”. Linode is the most comprehensive and independent open cloud provider serving businesses of all sizes. Cloud computing is the delivery of computing services, such as storage, servers, networking, databases, intelligence, software, analytics, etc., over the cloud. The mission of Linode cloud is to accelerate innovation by making cloud computing simple and accessible to everyone.
Infrastructure as Code (IaC) is a development and operations methodology that allows software configuration and server deployments to be represented as code. Terraform is an IaC tool that focuses on creating, destroying, and modifying servers instead of managing the software on those servers. Terraform offers various plugins to interface with different hosting providers, such as an official Linode plugin. Linodes created with Terraform can be further configured with container systems like Docker or configuration management software like Puppet, Salt, Ansible, Chef, etc.
Prerequisites
- A personal access token for Linode’s v4 API to use with Terraform.
Install Terraform
The installation steps in this tutorial are for Linux operating systems. To install Terraform on a different operating system, like macOS, view theTerraform’s downloads page. After the installation, skip to the Building with the Terraform Provider step.
>> Note: The Terraform Provider for Linode requires Terraform version 0.12.0+. The examples in this tutorial were written to be compatible with Terraform version 0.11 and may be updated shortly.
To install Terraform on a Linux Operating system, follow the below steps:
1. First, open a terminal and make a Terraform project directory in the home directory by executing the following command:
mkdir ~/terraform
2. After that, navigate to the created directory by executing the following command:
cd ~/terraform
3. Next, download the following files from Terraform’s website. Users should inspect the links on the download page to see if a newer version is available and update the wget commands to use those URLs instead before executing the following commands:
- To download the 64-bit Linux .zip archive, execute the following command:
wget https://releases.hashicorp.com/terraform/0.12.5/terraform_0.12.5_linux_amd64.zip
- To download the checksum signature file, execute the following command:
wget https://releases.hashicorp.com/terraform/0.12.5/terraform_0.12.5_SHA256SUMS.sig
- To download the SHA256 checksums file, execute the following command:
wget https://releases.hashicorp.com/terraform/0.12.5/terraform_0.12.5_SHA256SUMS
Verify the Download
1. Execute the following command to import the HashiCorp Security GPG key, which is listed on the HashiCorp Security page under the Secure Communications section:
gpg --recv-keys 51852D87348FFC4C
>> Note: If the user receives errors that indicate the dirmngr software is inaccessible or missing, install dirmngr using the package manager and re-run the GPG command.
2. Next, verify the checksum file’s GPG signature by executing the following command:
gpg --verify terraform*.sig terraform*SHA256SUMS
3. The output of the above command should contain the Good signature from the “HashiCorp Security <security@hashicorp.com>” confirmation message.
4. Verify that the fingerprint output matches the fingerprint listed in the Secure Communications section of the HashiCorp Security page.
5. After that, verify the .zip archive’s checksum by executing the following command. The output of the below command should display the Terraform file name.
sha256sum -c terraform*SHA256SUMS 2>&1 | grep OK
Configure the Terraform Environment
1. Execute the following command to unzip terraform_*_linux_amd64.zip file to the created ~/terraform directory:
unzip terraform_*_linux_amd64.zip
2. After that, edit the ~./profile file to include the ~/terraform directory in the PATH. Then, reload the bash profile:
echo 'export PATH="$PATH:$HOME/terraform"' >> ~/.profile
source ~/.profile
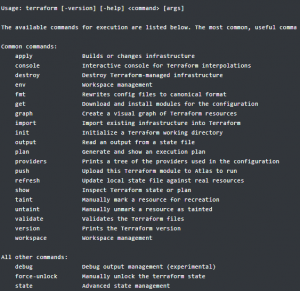
3. Execute the following command to verify Terraform can run by simply calling it with no arguments or options.
terraform
Build with the Linode Provider
1. First, create the linode-terraform-web.tf file in the ~/terraform directory with the snippet below. Replace the Linode API token, desired root password, and public SSH key in the below content.
terraform {
  required_providers {
    linode = {
      source = "linode/linode"
      version = "1.16.0"
    }
  }
}

provider "linode" {
  token = "YOUR_LINODE_API_TOKEN"
}

resource "linode_instance" "terraform-web" {
        image = "linode/ubuntu18.04"
        label = "Terraform-Web-Example"
        group = "Terraform"
        region = "us-east"
        type = "g6-standard-1"
        authorized_keys = [ "YOUR_PUBLIC_SSH_KEY" ]
        root_pass = "YOUR_ROOT_PASSWORD"
}
2. Next, execute the following command to initialize the Terraform configuration:
terraform init
3. Execute the Terraform’s plan command. This command won’t take any action or make any changes to the Linode account. Instead, an analysis is done to determine which actions (i.e., Linode instance creations, modifications, or deletions) are required to achieve the state described in the configuration.
terraform plan
4. If there are no errors, execute the following command to start the deployment:
terraform apply
5. Enter yes and press the ENTER key to confirm the deployment.
6. Finally, visit the Linode Manager to view that the deployed environment is added to the Linode account.
Destroy Servers
Terraform includes a destroy command to delete or remove servers managed by Terraform. Before running the destroy command, the user can run the plan command with the -destroy option to view which servers would be removed after executing the destroy command.
terraform plan -destroy
In order to remove a server, follow the below steps:
1. Execute the following command to remove all the servers listed from the last session.
terraform destroy
2. Next, confirm the deletion by entering yes when prompted.
3. Visit the Linode Manager and verify that the Linodes were removed.
4. Finally, execute the following command to remove the configuration files:
rm *.tf
Conclusion
This tutorial presents the steps to install Terraform on Linode environments. Hope this tutorial was helpful, and do reach out to us if you have any query or suggestions.


